Saturday, December 22, 2012

Parent Volunteer Gifts - Mini Cookie Jars

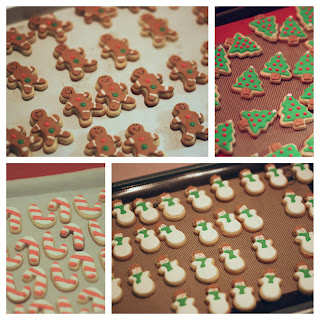
Every year I make something at the holidays to thank all of the parent volunteers that help in my classroom.  I've made fudge, banana bread and caramels over the last few years.  This year I decided to do something new.  I made mini sugar cookies and put them in canning jars.
mini sugar cookies, holiday cookies, mini cookie jars
I have a sugar cookie recipe that I found a few years when I was having my niece over for our first Auntie and Ruby cookie decorating day.  It is from Food Network. It uses granulated and powdered sugar, which I think makes them a little fluffier.  It also calls for orange zest, which adds a nice flavor to the cookie.

Sugar Cookies
From: Food Network 
 
Ingredients:
2 1/2 cups all-purpose flour 
1/2 teaspoon baking powder
1/4 teaspoon fine salt
1 cup (2 sticks) unsalted butter, at room temperature
3/4 cup granulated sugar 
3/4 cup powdered sugar
2 large egg yolks
1 teaspoon pure vanilla extract 
1/4 teaspoon finely grated orange zest

Directions:
Whisk the flour, baking powder, and salt in a medium bowl. Beat the butter and both sugars in another medium bowl with an electric mixer on medium-high speed until light and fluffy, about 30 seconds. Add the egg yolks, vanilla and orange zest mixing until fully incorporated. Slowly add the flour mixture, and continue beating until the dough comes together, stopping and scraping down the sides of the bowl as needed. 
Divide dough in half, pat into disks, wrap in plastic wrap and refrigerate until firm, at least 2 hours.  
Roll dough between lightly floured parchment, or waxed paper, until about 1/3-inch thick. Transfer sheets to a baking sheet and refrigerate until firm, about 30 minutes. Cut into desired shape using a cookie cutter, place them on ungreased baking sheets, leaving about 1-inch between cookies. (Gather the dough scraps together, pat into a disk, chill and reroll.)
Refrigerate cookies while preheating the oven to 375 degrees F, for at least 30 minutes.
Bake the cookies, until the bottoms are golden, about 10 to 15 minutes depending on shape. Cool on sheets until firm enough to transfer to a rack to cool. Decorate as desired and serve, or store in an airtight container at room temperature for up to 1 month.

christmas cookies
 
I've tried a few different royal icing recipes, but I came across this one recently from  Sweet Sugarbelle and will probably stick with it.  

Royal Icing
  
Ingredients
  • 4lbs {two bags} confectioner’s sugar
  • 3/4 c. meringue powder
  • 1 1/3-1 1/2 c. warm water
  • 2-4 tbsp. oil-free extract or flavoring
Instructions
  1. Add the dry ingredients first. Use your mixer’s whisk attachment to incorporate the sugar and meringue powder.
  2. Add the extract to the water and slowly add it to the dry ingredients while mixing. At first the icing will be very liquid-like.
  3. Continue to mix it at medium-high speed until it is fluffy and stiff peaks form, about 7-10 minutes. Mixing times are approximate, keep your eye it icing and stop mixing as soon as it becomes stiff.
christmas cookies
 
I spent a Saturday night working on them, but I'm really happy with they way they turned out.  My husband thinks I'm crazy because I enjoy doing this, but now I'm looking for more excuses to make decorated cookies.   

Saturday, December 15, 2012

Cookie Exchange

I've heard about cookie exchanges for years and have seen a lot about them on Pinterest lately.  I decided to host one this year.  I thought it would be a good excuse to get some friends together around the holidays and we all would end up with some great cookies.

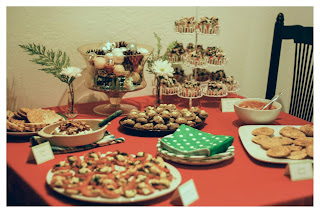
Along with the cookies, I made some appetizers and holiday drinks.  Although its not that cold in California in December, I thought hot chocolate would be a yummy drink.  It also gave me an excuse to make some cute marshmallow stir sticks.  I put out some Kahlua if people wanted to add it to their drink.  It's my favorite!

cookie exchange

I also made a Candy Cane Cocktail.  This was delicious.  It was a mixture of strawberry vodka, cranberry juice, and creme de menthe.

cookie exchange

I had some appetizers for people to snack on and I made a dessert for everyone to eat while at my house. 

cookie exchange, peppermint rice krispie treats

These Peppermint Oreo Rice Krispie Treats were amazing.  They had Trader Joe's Peppermint Jo Jo's in them. On top they had crushed candy canes and were drizzled with white and semi-sweet chocolate. 

All the cookies that my friends brought were delicious also.  I put out all of my white platters for them to put the cookies on before we did the exchange.
 
cookie exchange

I found some super cute mini spatulas at Target that I got for a party favor.  I tied a mini cookie cutter to each one also. 

For the exchange, I made Peppermint Meringue Drops.  I found the recipe last year in Sunset Magazine.  I made them twice and everyone loved them, so I thought I'd make them again.  I always thought that meringue cookies would be difficult, but they were pretty simple to make. 

Peppermint Meringue Drops
From: Sunset Magazine

Ingredients:
  • 2 large egg whites, at room temperature 
  • 1/8 teaspoon cream of tartar
  • 1/2 teaspoon vanilla extract
  • 1/8 teaspoon salt
  • 3/4 cup sugar
  • 1 cup white chocolate chips
  • 1/3 cup plus 1 1/2 tbsp. coarsely crushed peppermint candies
Preparation:
  1. Preheat oven to 250°. Beat egg whites and cream of tartar in a deep bowl with a mixer, using whisk attachment if you have one, just until soft peaks form. Add vanilla and salt. With motor running and mixer on high speed, pour in 1 tbsp. sugar and beat 10 to 15 seconds, then repeat until all sugar has been added. Scrape inside of bowl and beat another 15 seconds. At this point, meringue should form straight peaks when beaters are lifted. Fold in chocolate chips and 1/3 cup candies with a flexible spatula.
  2. Line 2 baking sheets with parchment paper, using a bit of meringue at corners as glue. Using a soup spoon, drop meringue in rounded 1-tbsp. portions slightly apart onto sheets, scraping off with another spoon. Sprinkle with remaining 1 1/2 tbsp. candies.
  3. Bake until meringues feel dry and set when touched but are still pale, 30 to 35 minutes, switching pan positions halfway through. Turn off oven, open door, and let cookies stand about 10 minutes. Let cool on pans.
  4. Make ahead: Up to 2 days, stored airtight.
I realized after I made these that they might not last very long, so I started searching for another recipe that I could also make.  I found a recipe for a soft gingerbread cookie.  Luckily I had all of the ingredients.  They were good and I'll definitely make them again next year.

White Chocolate topped Ginger Cookies
From: Culinary Concoctions by Peabody

Ingredients:

3 cups flour
2 tsp. Ginger, Ground
1 tsp. Cinnamon, Ground
1 tsp. baking soda
1/4 tsp. Nutmeg, Ground (I used fresh)
1/4 tap salt
3/4 cup (1 1/2 sticks) unsalted butter, at room temperature
3/4 cup firmly packed brown sugar
1/2 cup molasses
1 egg
1/4 cup granulated sugar
1 tsp. Vanilla Extract
1 cup white chocolate chips

Preparation:

Mix flour, ginger, cinnamon, baking soda, nutmeg and salt in large bowl.
Beat butter and brown sugar in large bowl with electric mixer on medium speed until light and fluffy.
Add molasses, egg and vanilla; beat well. Gradually beat in flour mixture on low speed until well mixed. Press dough into a thick flat disk. Wrap in plastic wrap. Refrigerate 4 hours or overnight.
Preheat oven to 350°F. Shape dough into 1-inch balls. Roll in granulated sugar. Place 2 inches apart on ungreased baking sheets.
Bake 8 to 10 minutes or until edges of cookies just begin to brown. Immediately press about 5-6 white chocolate chips into center of each cookie. Remove to wire racks; cool completely.

Unfortunately, I forgot to take pictures of my cookies up close:( 

The exchange was fun.  Hopefully everyone will want to do it again next year.  It was a nice way to start the holiday season.

Sunday, November 25, 2012

Fall Baking

I love fall...the changing trees, cool days, and pumpkin pie.  I love all things pumpkin.  The past few weeks I have been very busy baking with pumpkin and pumpkin pie spice.  Here's a quick run down on what I've made.


Pumpkin Spice Donut Hole Muffins
From: Glorious Treats
These were for my husband to take to work.  A great, yummy treat any time of day.

Candy Corn Cupcakes
I saw these on Pinterest and they were perfect for the Fall Festival at my husband's school.


Pumpkin Pie Spice Cookies
Another great recipe from Glorious Treats.  I made these for school and they gotten eaten up quickly.  A great fall cookie.


Pumpkin Cupcake with Cinnamon Cream Cheese Frosting
From: Half Baked
These were great.  Super moist and not too much cinnamon in the frosting.

No Bake Pumpkin Cheesecake
From: Skinnytaste
This was really easy and really yummy.  She used a pre-made pie graham cracker crust, but I made my own. 


Pumpkin Fudge
From: jamiecooksitup
This was great.  It was rich, but not too rich.  It made a lot, so next time I would probably half the recipe.  It's a bad picture, really looks much better in real life.

 
Cinnamon Cheesecake with Pumpkin Pie Frosting
From: gimme some oven
I made these for Thanksgiving. They were delicious and since they have pumpkin pie on top, no one missed having a regular pie.

Pecan Phyllo Tarts
From: Skinnytaste
This was the other dessert for Thanksgiving.  They are made with frozen phyllo cups, so they were quick to make. 

Pumpkin Pie
Filling From: Skinny Taste
Crust From: Made
For our second, Thanksgiving my sister requested pumpkin pie for dessert.  I found the pie filling on Skinny Taste.  It was good and I couldn't tell a difference from my old pie recipe.  She used ready made pie crust, but I tried a new recipe that I found.  This recipe used vinegar and an egg.  It made a great crust.  The recipe makes enough for more than one pie.  Now I have crust ready to go in the freezer.

Chocolate Pie
From: You Say Tomato
I made this for Thanksgiving also.  It is a great recipe from a friend.  It uses tofu in the filling, so it has a lot of protein.  She has started teaching her own cooking classes and has some great recipes.

Now I'm ready for Christmas baking.  Bring on the peppermint and gingerbread!


Monday, November 12, 2012

Amy Butler Cosmo Bag

Last year my students gave me an Amazon gift card for Christmas.  Whenever I get gift cards, I like to buy things that I want, but wouldn't buy for myself.  One thing I got was Amy Butler's Style Stitches


I love her fabric and her designs. My first project was the cover project, the Cosmo Bag.

amy butler cosmo bag

I'm really into yellow and gray right now, so I chose some Amy Butler yellow and gray fabric. 
amy butler cosmo bag

I love it.  It has 5 pockets on the inside and 2 on the outside.  Sometimes, I think it has too many pockets because I can't remember which pocket I put my keys in.

amy butler cosmo bag


amy butler cosmo bag

It wasn't that difficult to make, but definitely not a beginner project.  I think that it took me just as long to cut out all of the pieces as it did to sew the bag.  I can't wait to make another bag from the book.

Saturday, September 29, 2012

Peach Cheesecake

Before school started we were invited to a brunch.  The hostess called it "drunk brunch".  I was in charge of bringing dessert and thought that I should bring something with alcohol in it. 

When I was talking about it with my husband, he remembered an idea that someone had given us while in Napa.  They recommended soaking peaches in a sweet wine and put them on cheesecake. A perfect idea for our brunch.
peach cheesecake
I found a recipe on Epicurious from Bon Appetit. They didn't call for the wine soaked peaches, but I soaked them over night and topped the cheesecake in the morning.  I soaked the ones that were in the compote also, but since it was baked I'm sure the alcohol cooked out.

"Drunk" Peach Cheesecake
From: Bon Appetit via Epicurious
 
Ingredients
Crust
  • 25 gingersnap cookies (about 6 ounces), coarsely broken
  • 1/4 cup (1/2 stick) unsalted butter, melted
Filling
  • 4 small peaches (about 1 1/4 pounds), peeled, pitted, sliced 1/4 inch thick
  • 2 tablespoons plus 1 1/4 cups sugar
  • 1/2 teaspoon fresh lemon juice
  • 4 8-ounce packages cream cheese, room temperature
  • 4 large eggs
  • 1/2 cup sour cream
  • 1 1/2 teaspoons vanilla extract
Glaze
  • 1/2 cup peach preserves
  • 1 1/2 teaspoons fresh lemon juice
  • 1/2 large peach, peeled, pitted, very thinly sliced
Directions
 
For crust:
Preheat oven to 350°F. Grind gingersnaps in processor to coarse crumbs or crush in a zipper bag with a rolling pin. Add butter and blend until evenly moistened. Press crumbs over bottom and 1 inch up sides of 9-inch-diameter springform pan with 2 3/4-inch-high sides. Bake crust until beginning to brown, about 8 minutes. Cool on rack. Reduce oven temperature to 325°F.
 
For filling:
Combine peaches, 2 tablespoons sugar, and lemon juice in heavy large saucepan. Cover and cook over medium-high heat until sugar dissolves and peaches are juicy, stirring occasionally, about 5 minutes. Uncover and cook until peaches are tender and juices thicken, about 5 minutes. Cool compote.
Using electric mixer, beat cream cheese in large bowl until fluffy. Gradually add 1 1/4 cups sugar and beat until smooth. Beat in eggs 1 at a time. Mix in sour cream and vanilla. Spoon half of cheese mixture (about 3 cups) into crust. Spoon peach compote over by tablespoonfuls, spacing apart. Top with remaining cheese mixture.
Place large piece of foil on oven rack. Place pan with cheesecake on foil. Bake until puffed, set in center, and beginning to brown, about 1 hour. Place hot cheesecake on cooling rack; cool 5 minutes. Run small sharp knife around pan sides to loosen. Place cheesecake, uncovered, on rack in refrigerator and chill overnight. (Can be made 2 days ahead. Cover; keep chilled.)
 
For glaze:
Combine preserves and lemon juice in heavy small saucepan. Stir over medium heat until glaze comes to simmer. Strain into small bowl. Release pan sides; place cheesecake on platter. Spread glaze over top of cheesecake to within 1/4 inch of edge. Chill cheesecake until glaze sets, at least 30 minutes and up to 8 hours. Arrange peach slices in center of cake and serve.
peach cheesecake

It was delicious.  I wish I would have had a chance to go to the farmers' market for the peaches, but store bought worked just as well.


Saturday, September 22, 2012

Chocoate Chip Cookies

One night, a friend of my husband's stopped by for dinner.  We weren't expecting him, so I didn't have anything prepared for dessert...I always have a dessert when someone is here for dinner:)  They were sitting around watching baseball or football or something sporty on TV and I getting a sweets craving.


I had seen this recipe for The Best Chocolate Chip Cookie on Pinterest and decided I would try them out.  I could satisfy my sweet tooth and make sure I kept my dessert serving reputation. 

They were great!!  A glass of milk with a couple of cookies and we had very happy bellies.

Best-Ever Chocolate Chip Cookies
From: Apple a Day - barely adapted from Anna Olson, Food Network Canada
Ingredients: 
3/4 c. unsalted butter, softened 
3/4 c. brown sugar 
1/4 c. granulated sugar 
1 egg 
2 tsp. vanilla extract 
2 c. all purpose flour 
2 tsp. cornstarch 
1 tsp. baking soda 
1/2 tsp. salt 
1 c. bittersweet chocolate chips

Directions:
1.  Preheat oven to 350 degrees F.
2.  In the bowl of a stand mixer fitted with a paddle attachment, cream together butter and sugars until fluffy and light in color. Add egg and vanilla and blend in.
3.  Mix in flour, cornstarch, baking soda and salt. Stir in chocolate chunks.
4.  Using a standard-sized cookie scoop or tablespoon, drop dough onto a prepared baking sheet.  Bake for 8-10 minutes, until barely golden brown around the edges.  (The tops will not brown, but do NOT cook longer than ten minutes.)
5.  Let cool, on the sheet, on a wire rack for five minutes.  Remove from baking sheet and let cool completely.  
 
Makes approximately 3 dozen.  I would probably half the recipe if I was just making them for us in the future.  I sent quite a few home with our friend.

Saturday, September 15, 2012

Strawberry Rhubarb Crumble

Last summer, when we visited my husband's grandma in Cape Cod we went to the annual Fourth of July pie sale.  It's a pretty big deal.  Everyone stands around the table with their hand on the pie they want and at 6:00 you can buy your pie.
My brother-in-law and I stood in line to get pies for everyone.  I chose apple and strawberry rhubarb.  My husband and his brothers made fun of me...they said that no one likes rhubarb.  Well, Grammy loves rhubarb.  The rhubarb pie was the first one gone (mostly because she and I were the only ones eating pie).

This summer she came to stay with us for a few days.  I wanted to make her a rhubarb pie, but didn't have time to deal with crust.  I found a great recipe for strawberry rhubarb crumble at Smitten Kitchen.
It was my first time making anything with rhubarb.  She was excited and again said that it was her favorite.  I served it with some ice cream and it was great. 

Strawberry-Rhubarb Crumble
From Smitten Kitchen

For the topping:
1 1/3 cup flour
1 teaspoon baking powder
3 tablespoons sugar
3 tablespoons Demerara sugar (or turbinado sugar aka Sugar in the Raw)
Zest of one lemon
1/4 pound (1 stick or 4 ounces) unsalted butter, melted

For the filling:
1 1/2 cups rhubarb, chopped into 1-inch pieces
1 quart strawberries plus a few extras, hulled, quartered
Juice of one lemon
1/2 cup sugar
3 to 4 tablespoons cornstarch
Pinch of salt

1. Heat oven to 375°F. Prepare topping: In a mixing bowl, combine flour, baking powder, sugars and lemon zest and add the melted butter. Mix until small and large clumps form. Refrigerate until needed.
2. Prepare filling: Toss rhubarb, strawberries, lemon juice, sugar, cornstarch and a pinch of salt in a 9-inch deep-dish pie plate.
3. Remove topping from refrigerator and cover fruit thickly and evenly with topping. Place pie plate on a foil lined baking sheet, and bake until crumble topping is golden brown in places and fruit is bubbling beneath, about 40 to 50 minutes.

Tuesday, September 11, 2012

My First Quilt: Downy Quilts for Kids

My aunt is a quilter.  A real quilter...she hand quilts. My whole life I remember her talking about quilts. Because of this, quilting seemed very daunting to me.
After I began sewing, I thought that I wanted to try quilting.  I was scared to try it.  Then I saw this blog post about Downy Quilts for Kids.  They send you a kit to make a quilt that then gets sent to kids that are hospitalized.  The kit comes with all of the fabric and instructions.  I decided this would be a great introduction to quilting and went to a great cause, so I ordered a kit.

When my kit arrived I was really excited.  The fabric would not have been my first pick of fabric, but I guess I can't be too picky.  It was the last week of school though, so I had to wait until I had some free time. 

When I finally sat down to work on it, the directions a little confusing.  I think they were written for someone that had quilting experience. Luckily Ashley at Make It and Love It had a great tutorial with a lot of pictures. 


I think that it turned out great.  I'm excited that my first quilt went to someone that could really use something homemade.  I'll definitely make another one.  Maybe I'll buy my own fabric so that it is even cuter!!

Saturday, August 25, 2012

Tagalong Cupcakes

I found this recipe in the fall and was waiting for Girl Scout Cookie time to make them. 


tagalong cupcake

Unfortunately for me, I wasn't eating treats when it was cookie time. I still bought my cookies and just put them in the freezer until I was ready to enjoy them.

I kind of forgot about them:) Then one day I was going through the freezer and found them. I knew it was time for this recipe. They were so good. My husband ate three of them and gave himself a stomach ache. I gave a few to my mom and step dad and he asked if I had any more after they finished them. I'll definitely make these again next Girl Scout Cookie season. 

Tagalong Cupcakes
Ingredients:
For the Cupcakes
1 white cake mix  
1 box Girl Scout Tagalongs 
For the Frosting 1 c. butter, softened  
1/2 c. peanut butter  
2 tbsp. water  
2-4 tbsp. honey  
1 tsp. vanilla  
1/8 tsp. salt  
4 c. powdered sugar
Instructions:
For the Cupcakes
Preheat oven to 350* Place liners in cupcake pan. Make up the cake mix according to the directions. Put 2 tbsp. of batter in the liner. Set a cookie on top and then finish filling the liner with batter. Fill it at least 3/4 of the way full. Bake 22 minutes. Let cool. Frost with Honey Peanut Butter Cream. 


tagalong cupcake
For the Frosting
Cream butter and peanut butter. Add the water, salt, and vanilla and cream again. Slowly add the powdered sugar. After all the sugar is added, beat in another 1-2 tbsp. water. Then beat in the honey until creamy.

Sunday, August 19, 2012

Toddler Blanket

My 2 1/2 year old niece loves Yo Gabba Gabba.  A few months ago I was fabric shopping in San Luis Obispo and found some Yo Gabba Gabba flannel.  I knew I had to get it and make her something.

Originally, I thought that I would make a pillow case.  Unfortunately, the design went the wrong direction.  I was making a receiving blanket and thought that I could make her a blanket too.
toddler blanket

I've never used minky and I thought that I would try it for this.  It is very soft, but not super thick.  I really like the way it turned out.

toddler blanket

I used the twin needle to top stitch this also.  It looks a little more professional, I think.

We were going on vacation with my husband's family, so I took it with us to give to her.  I gave it to her on the first day and she used it the whole time we were there.  Throughout the week she would randomly come up to me, give me a hug and say "Thank you for my blanket Auntie Caiti"  I'd say she liked it.


Receiving Blanket and Burp Cloths

When I first started sewing my sister sent me a link about some super soft burp cloths.  She was pregnant at the time, so I think she was hoping I'd make some for her.  Of course I did and for many other friends.  They have become my go to baby gift.  I love looking for cute flannels and the backing that I found is so soft. 

burp cloth

Then I decided to make a coordinating blanket to go with the burp cloths.  I gave the first set to a friend and within weeks of her son being born she asked if I could make her another one.  She said they were her favorite blankets. 

My brother's friend recently had a baby boy.  My mom asked if I would make some burp cloths to send to him.  I made a coordinating blanket too.

burp cloth, receiving blanket

I recently learned how to use the twin needle on my machine.  I thought that using it for the blanket would be a nice added detail rather than a single top stitch.


I think it turned out great.  I hope that baby Graeme likes them!

Saturday, August 11, 2012

Barbie Superhero Jammie Movie Birthday Party

My niece, R, decided that she wanted a Barbie Superhero Jammie Movie Birthday Party for her fourth birthday.  My sister started planning and I volunteered to help.  The plan was that I would make a Barbie Cake, cupcakes, and superhero capes for all of the kids.
The birthday girl with her cape, crown, and super hero jammies
I was very excited about making the Barbie cake.  I have wanted to make one ever since I got my Pampered Chef Classic Batter Bowl about 12 years ago.  R was very specific that the cake had to be purple and the cupcakes pink.  Barbie also had to have a superhero cape.

barbie super hero cake
My sister had kettle corn for the kids to snack on during the movie.  I also made some cake balls with the extra cake from the Barbie.

She set up a "theater" in her garage and projected the movie on the wall.

Banner made by our mom.
The kids wore their capes over their jammies.

Even Little E got a cape.